在这里介绍一下使用discourse建立论坛的基本流程,预期基础效果可参考官方样品站
魔改后的效果可以参考本站及友站
夏五同人站https://gego725.com/
尝试本教程需要:
有一定水平的英文阅读能力(大部分材料都是英文,没有官方中文翻译)
有一张可以支付外币的信用卡 (使用大陆阿里云服务器 的话不需要)
有购买服务器的经济水平(下文会提到如何估算成本,如果单人建站感到吃力的话可以多人合资or进行众筹)
能看懂/使用过简单的命令行或者比较有耐心
内容列表,点击可以跳转搭建一个论坛需要什么 购买主服务器 连接到主服务器 安装discourse 购买域名 设置邮件服务器 后续楼层已更新阿里云邮箱的设置方法 配置DNS 解析域名到主服务器 为discourse配置域名及邮件服务
0 搭建一个论坛需要什么
用于论坛运行的主服务器
一个论坛系统, 比如大家熟悉的随缘居 使用的系统是discuz,国内近二十年的主流都是它
域名, 方便你的用户记忆和识别网站
邮件服务器(取决于论坛软件,有的并不需要自己单独设置)
1 购买主服务器
discourse最低需要1GB的RAM,推荐购买2GB RAM及以上的服务器,下面的链接是阿里云的价格列表,有列出具体的参数,建议大概估算一下成本(大约占所有费用的90%)
如果想长期运营,最好不要一直一年一年的买,否则可能会遇到次年涨价很多的情况,推荐先买一年看看自己有没有耐心和能力去维护,如果能够稳定付出的话可以一次买3年或者5年的。
我自己横向对比过很多服务器提供商,考虑到价格和在国内无梯访问的速度,最后选择了香港阿里云(腾讯之类的在香港的分支可能效果也差不多)
可以看看有没有学生折扣或者free trial
如果觉得价格可以接受的话,购买以后就可以立刻开始安装了。以下的内容都以香港阿里云为基础进行解说。
2 连接到主服务器
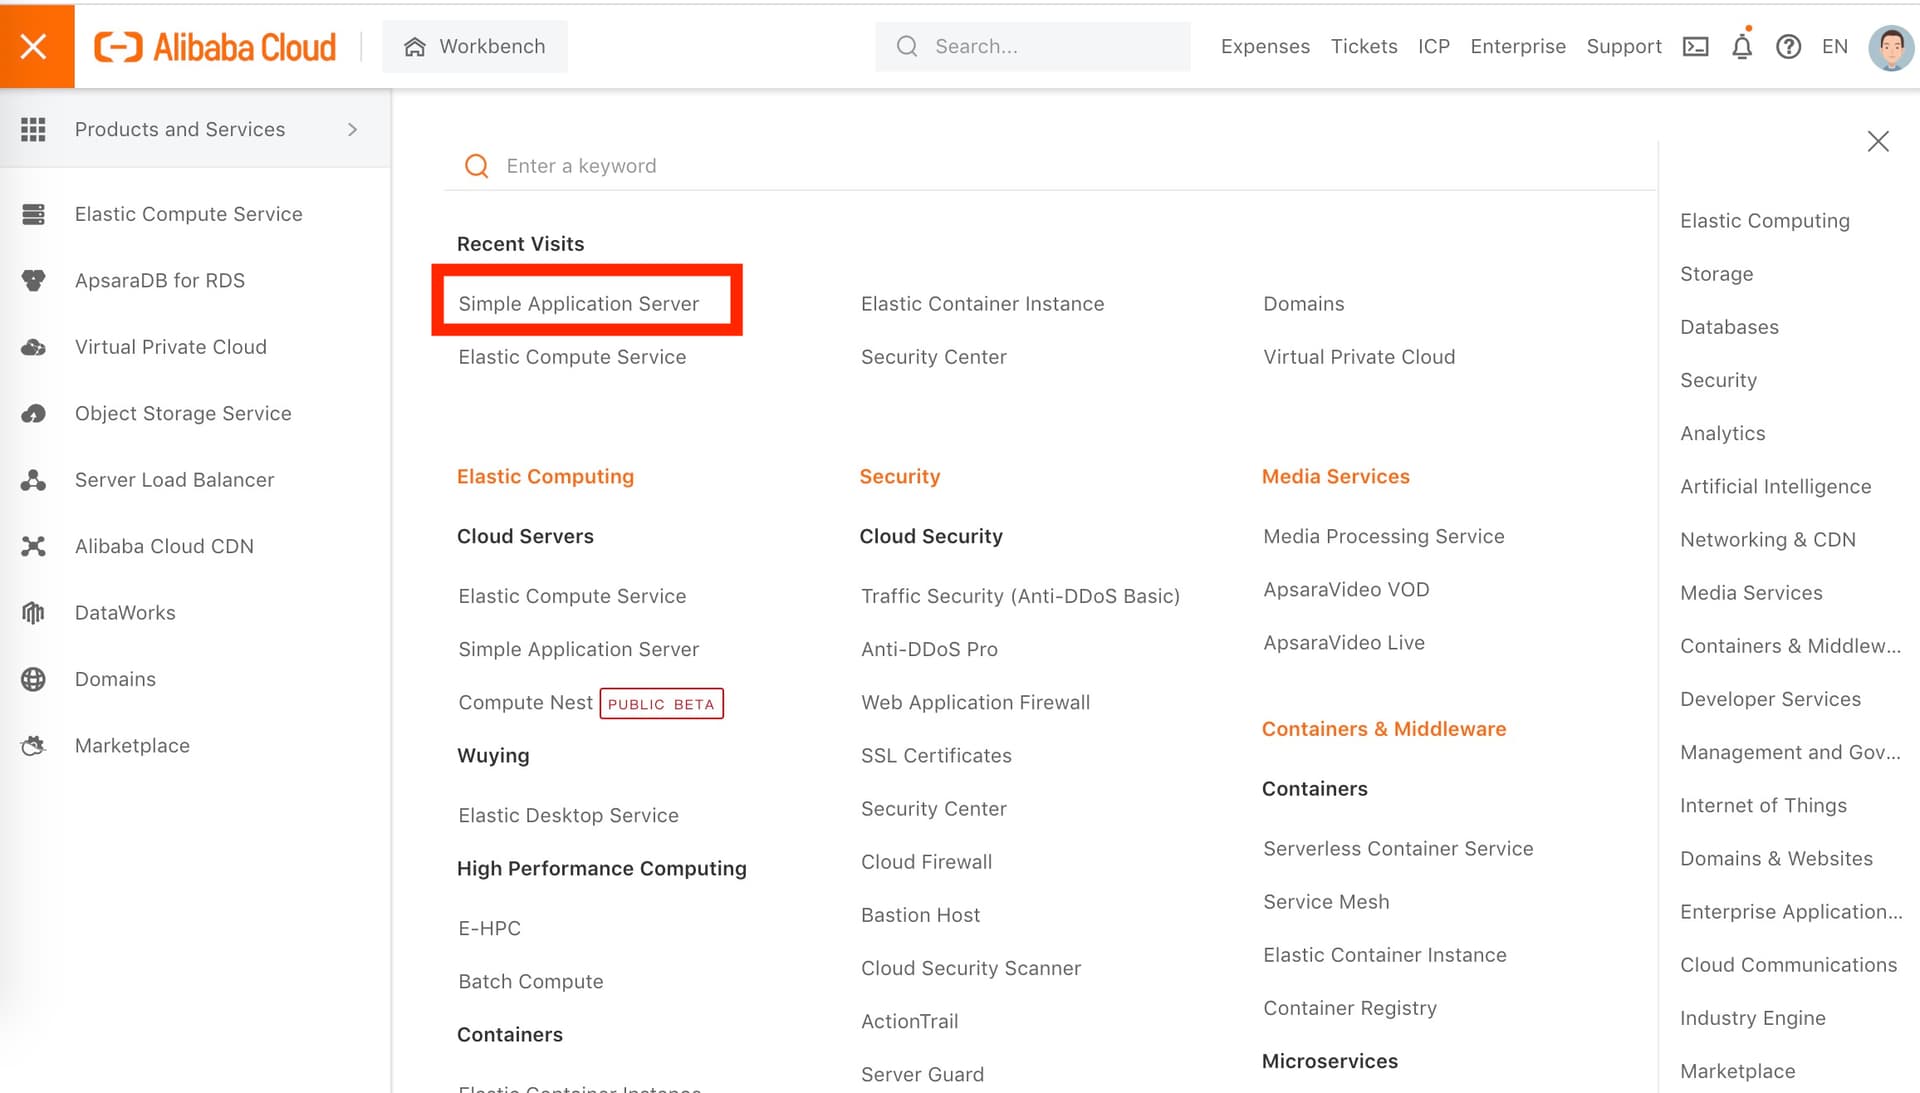
购买服务器以后选择右上角菜单的console进入个人页面
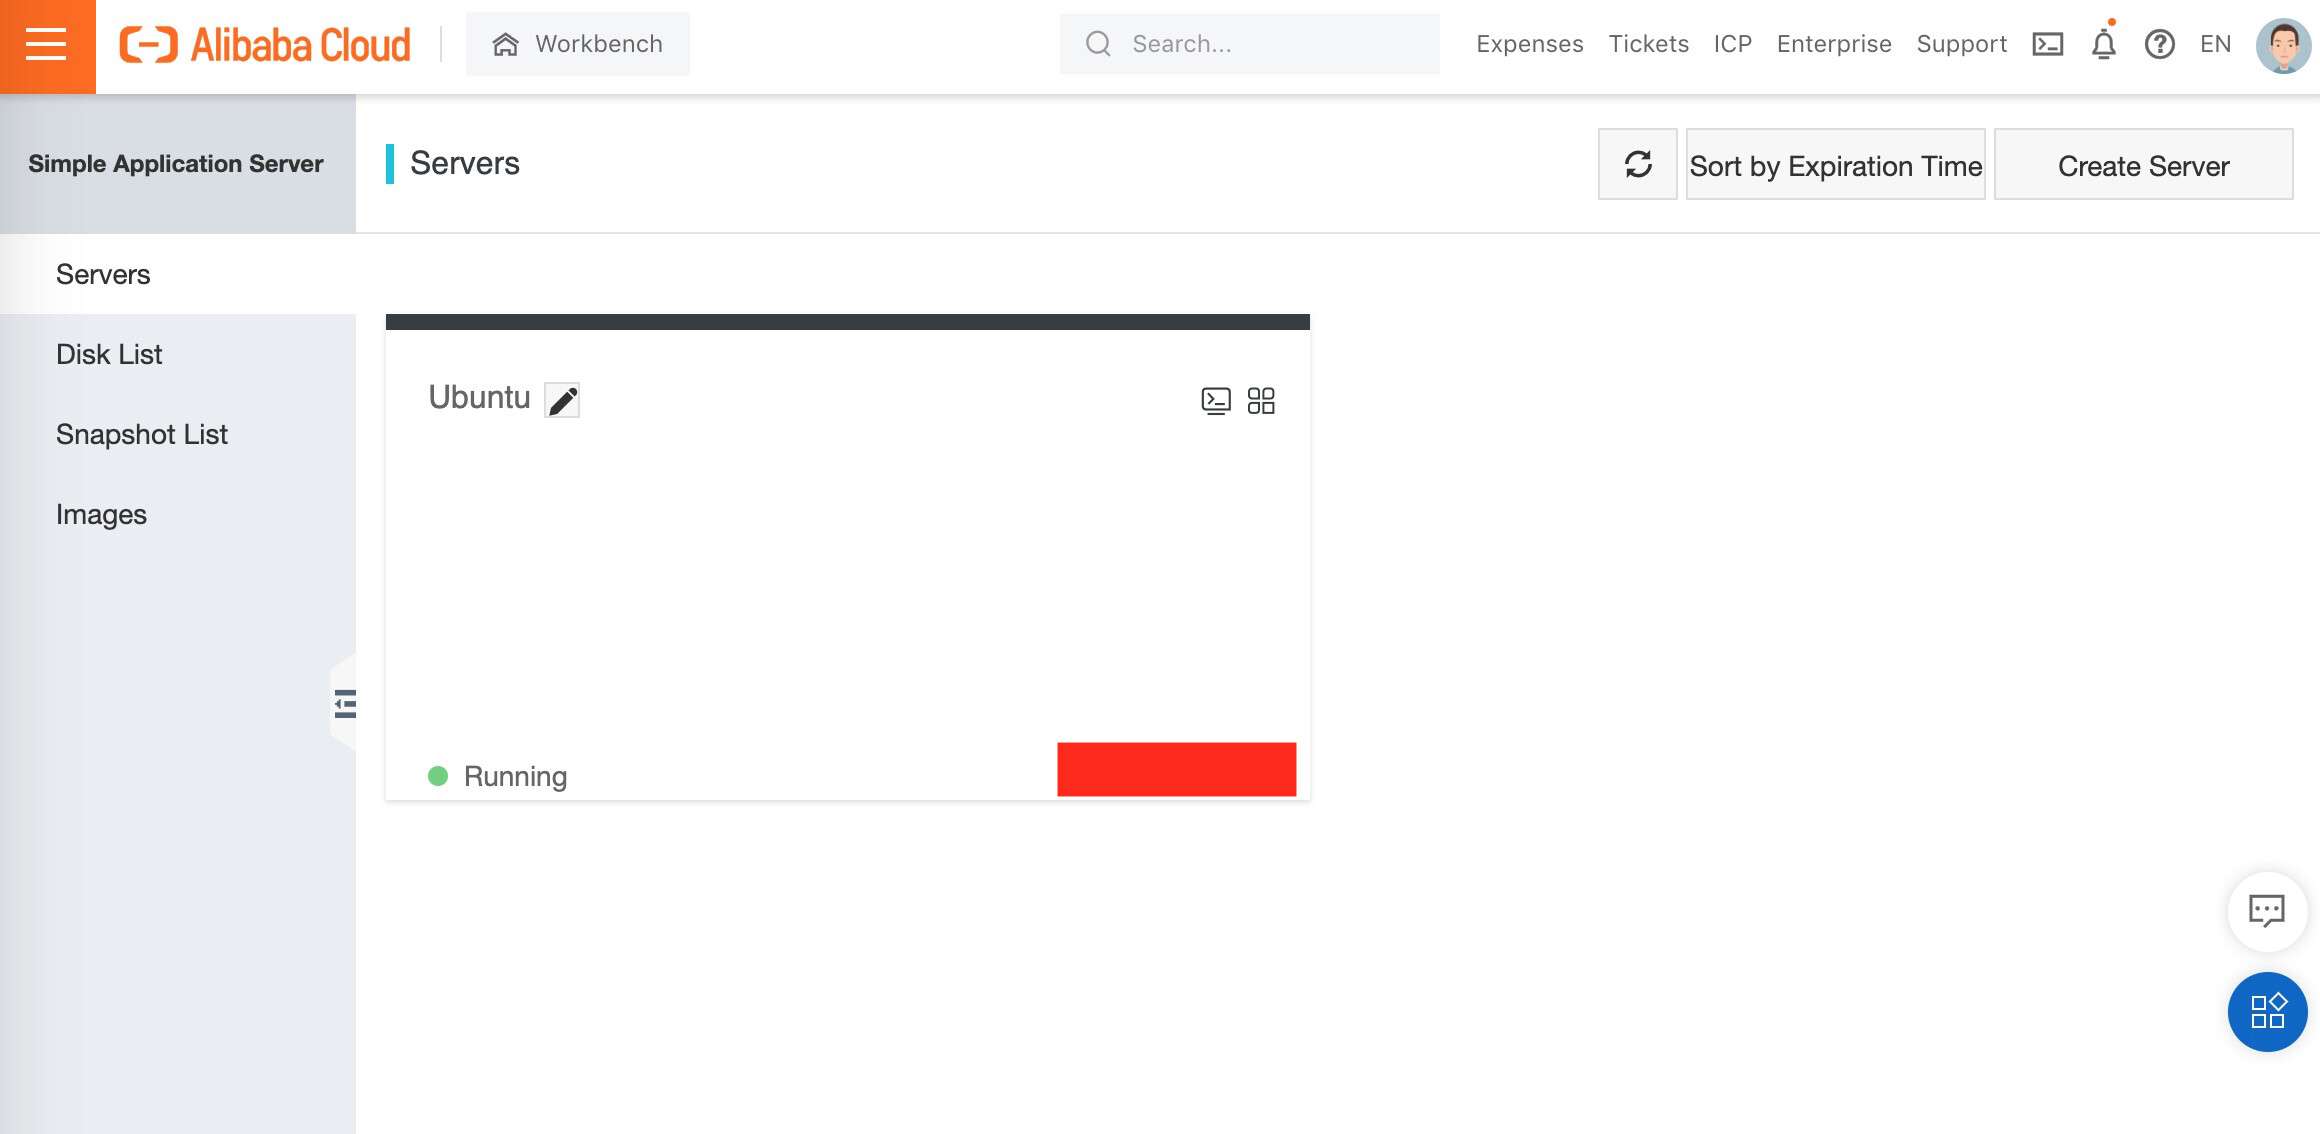
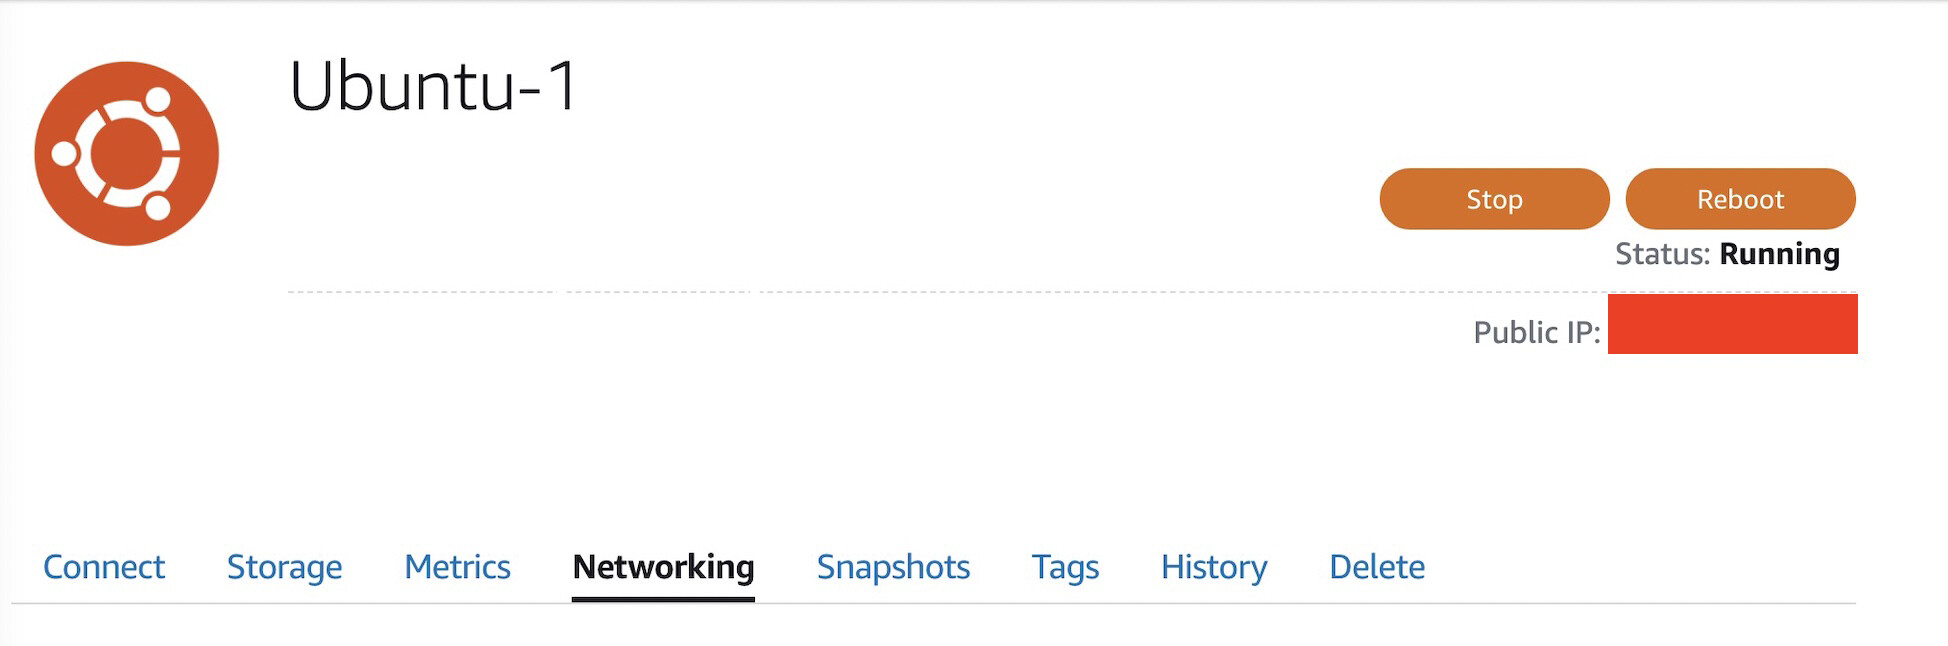
在弹出的菜单里选中购买的服务器类型(红框)进入实例列表
红色方块的位置为公网ip地址,先记下来。点选自己的实例进入控制台
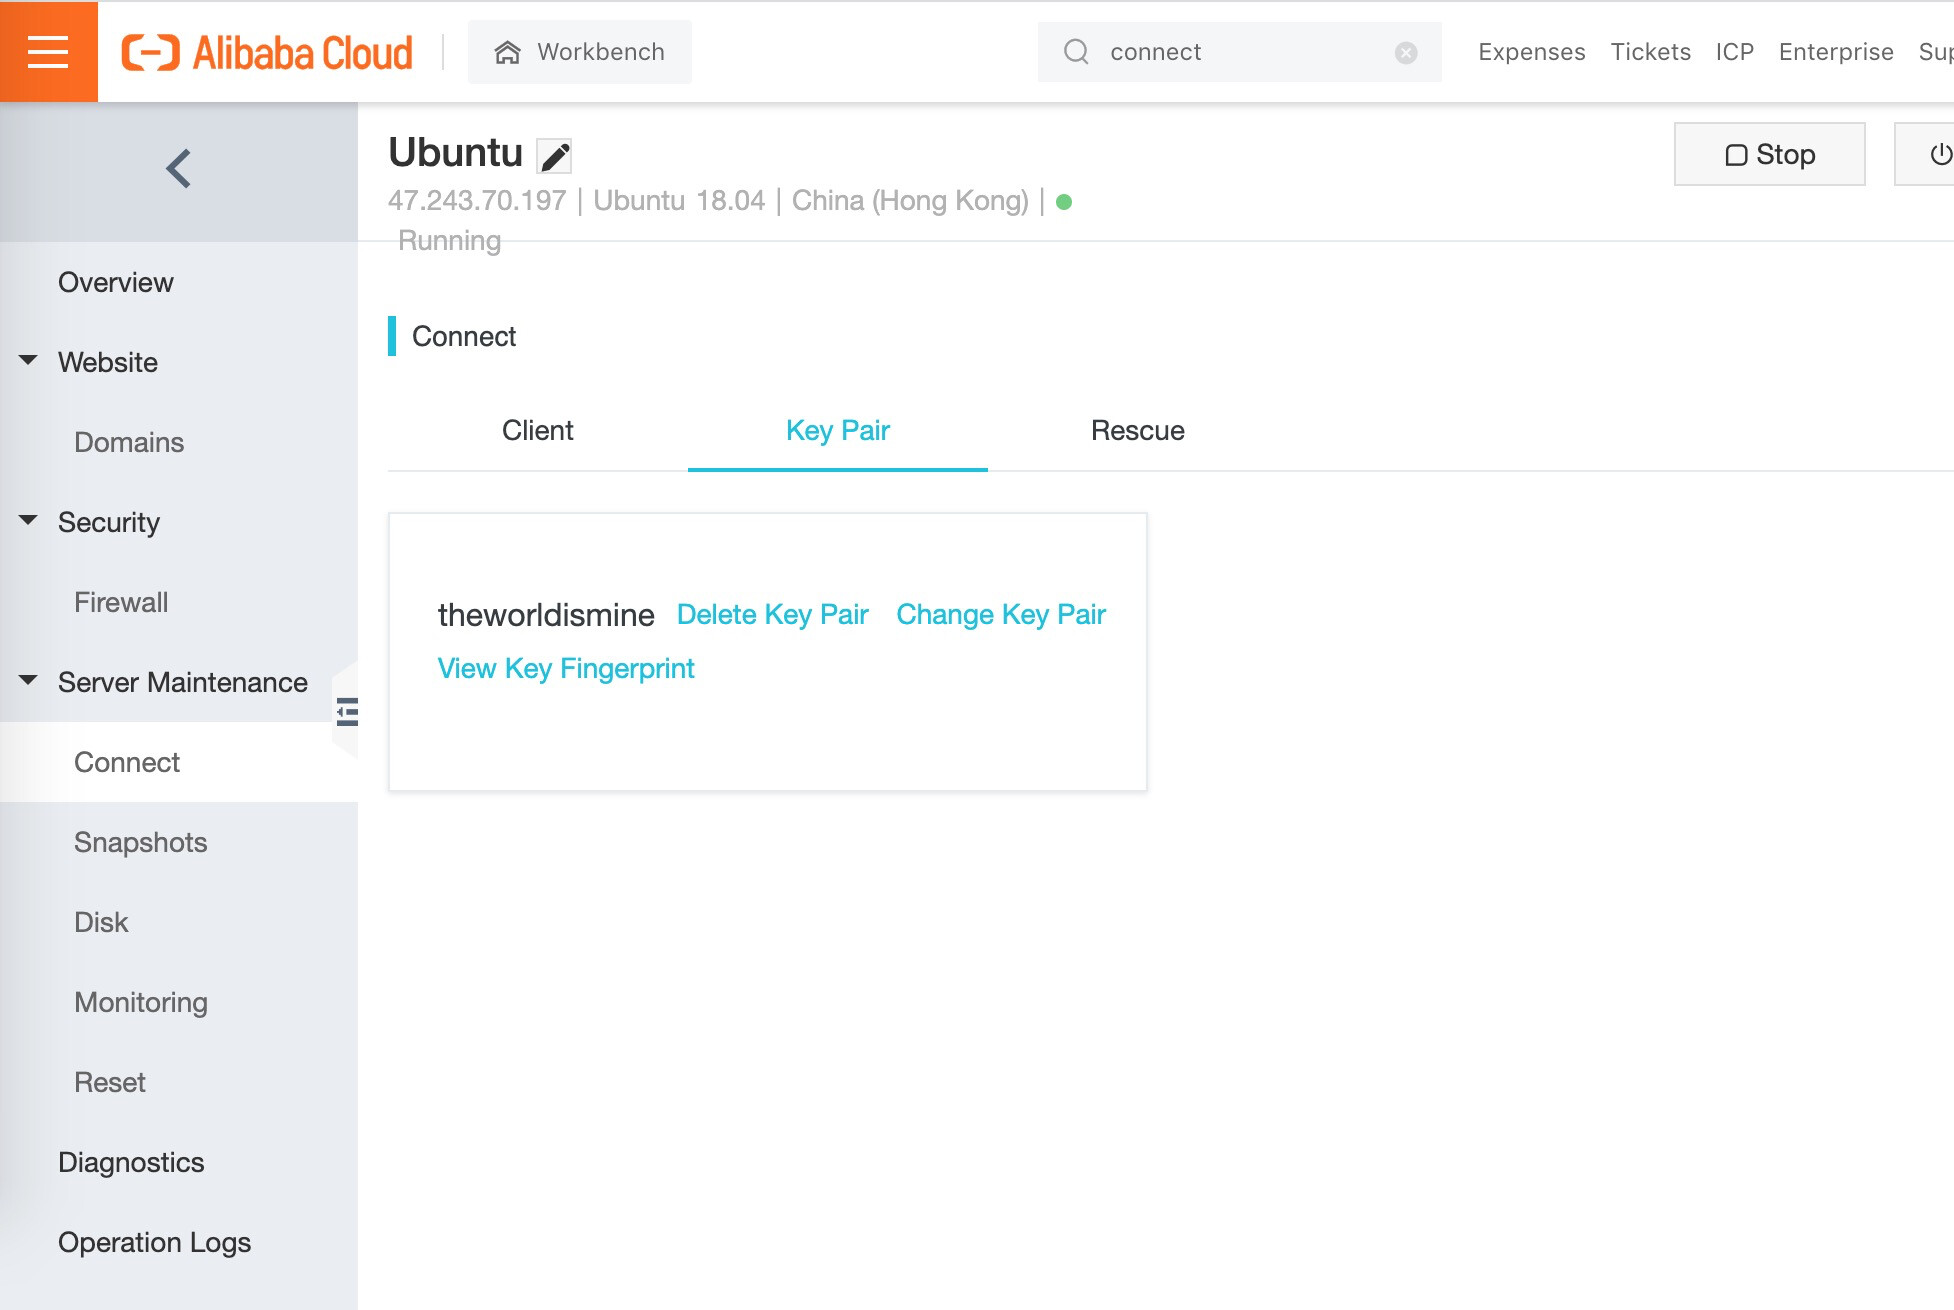
选择左侧的connect > key pair 按照提示生成并下载一个.pem密钥文件, Mac用户请保存在桌面(desktop),windows用户请保存在自己能找到的地方。
windows 用户可以用PuTTY进行远程连接http://www.noobyard.com/article/p-dgafhwwu-pq.html
Mac用户请打开terminal (终端)
如何打开terminal (终端)
输入
cd Desktop
并回车
输入
ssh -i [你的pem文件名无括号].pem root@上面记下的公网ip
并回车
如果提示permission问题或者public key, 请使用
chmod 400 [你的pem文件名无括号].pem
登录成功的话会显示你的用户名变为root@开头的一串字符
3 安装discourse
接下来按官方教程里的步骤#5和#6输入命令后根据提示进行安装
# Install Discourse on a Cloud Server

> To install and self-host Discourse, follow the steps below. But if you'd rather skip the setup, maintenance, and server management, our official Discourse hosting takes care of everything for you.
>
> 👉 [Learn more about Discourse hosting](https://discourse.org/pricing)

> If you prefer to self-host but need help setting it up we have partners who can help.
> [Click here to explore self-hosting set-up options](https://discourse.org/partners).

**Set up Discourse in the cloud in under 30 minutes** with zero knowledge of Rails or Linux shell. One example
is [DigitalOcean][do], but these steps will work on any **Docker-compatible** cloud provider or local server. This
walkthrough will go through these in detail:

**[Before you start](#before-you-start)**

1. [Preparing your domain name](#1-preparing-your-domain-name)
2. [Setting up email](#2-setting-up-email)

**[Installation](#installation)**
显示原始文件
如果提示 command 'git' not found ...
请参考:https://zhuanlan.zhihu.com/p/137578868
# Install Discourse on a Cloud Server

> To install and self-host Discourse, follow the steps below. But if you'd rather skip the setup, maintenance, and server management, our official Discourse hosting takes care of everything for you.
>
> 👉 [Learn more about Discourse hosting](https://discourse.org/pricing)

> If you prefer to self-host but need help setting it up we have partners who can help.
> [Click here to explore self-hosting set-up options](https://discourse.org/partners).

**Set up Discourse in the cloud in under 30 minutes** with zero knowledge of Rails or Linux shell. One example
is [DigitalOcean][do], but these steps will work on any **Docker-compatible** cloud provider or local server. This
walkthrough will go through these in detail:

**[Before you start](#before-you-start)**

1. [Preparing your domain name](#1-preparing-your-domain-name)
2. [Setting up email](#2-setting-up-email)

**[Installation](#installation)**
显示原始文件
如果提示 Unable to locate package docker.io
请使用
sudo apt-get install docker.io
等待安装的过程中我们可以先进行以下步骤
4 购买域名
namesilo
Find available domains in seconds. Get free privacy, low first-year pricing, and honest renewals. No upsell traps—just fast, secure domain registration.
算是比较便宜的域名服务了,买自己想要的就可以(最好比较好记而且没有敏感字符,否则你在各种平台上宣传的时候会发不出去)
下一步设置邮件服务器要用,所以要先买
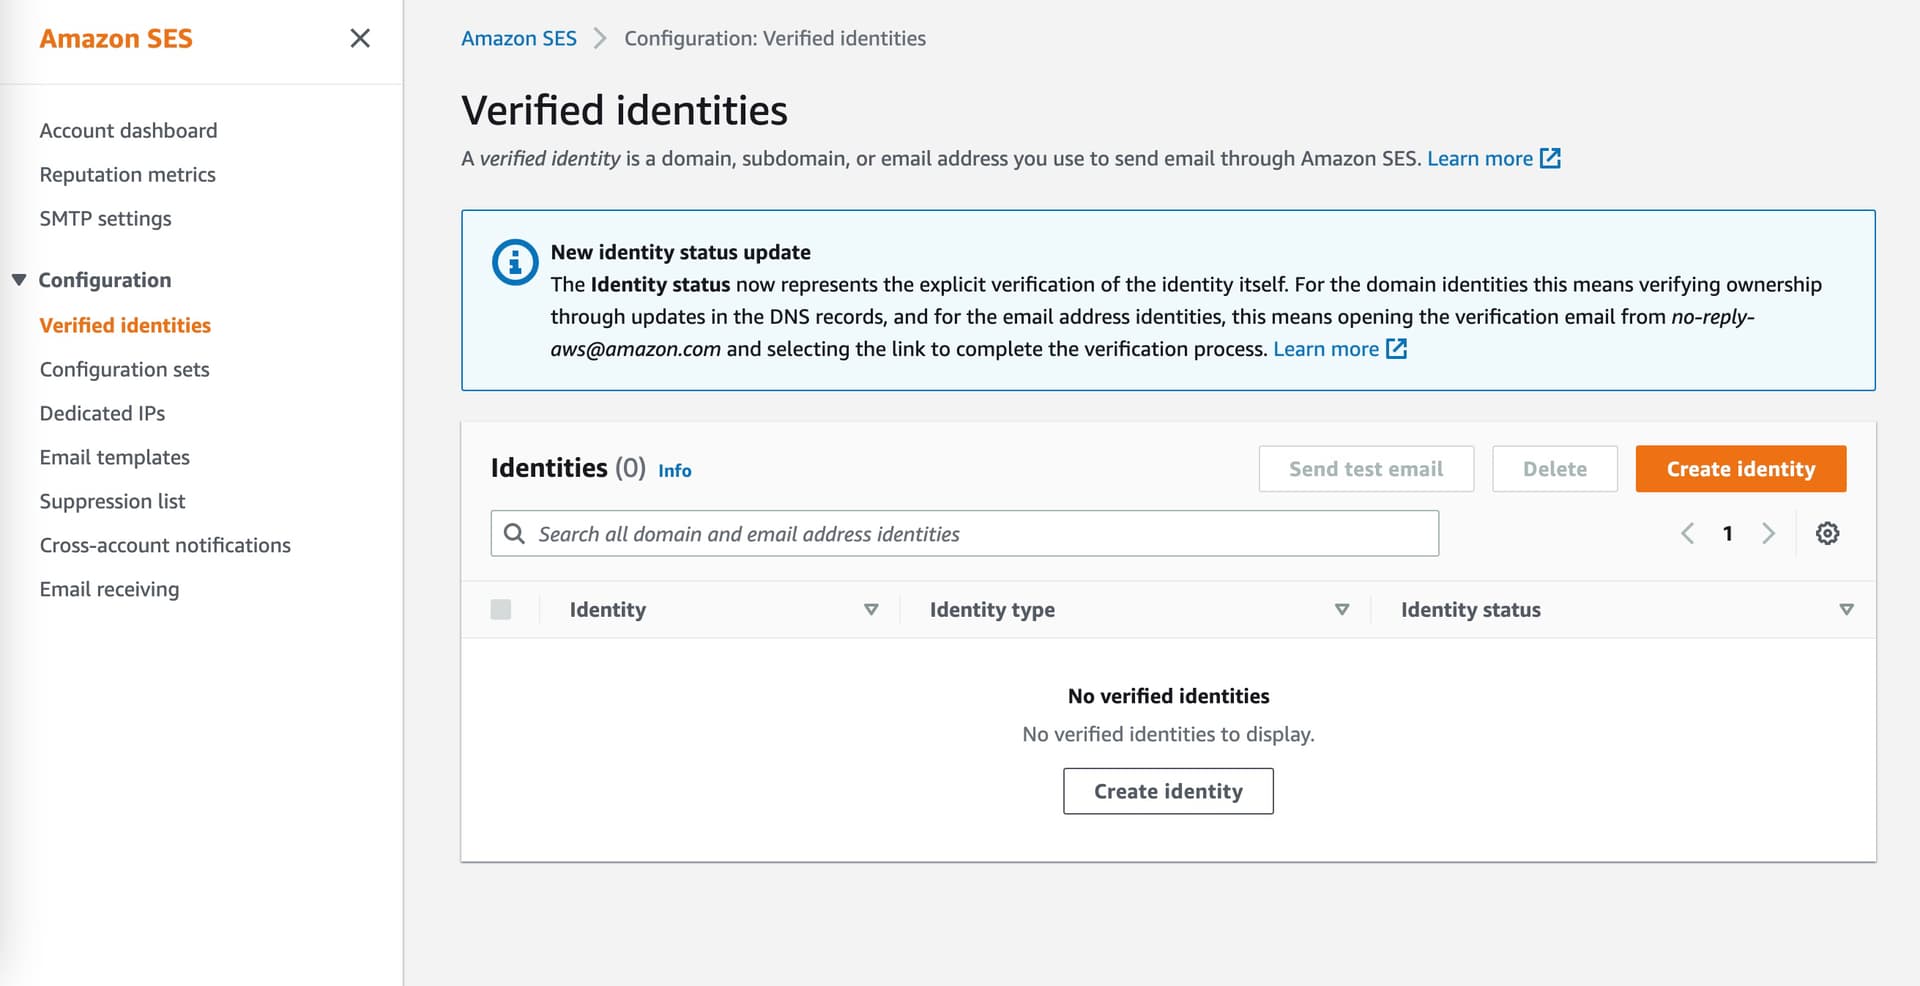
5 设置邮件服务器
Powerful Transactional Email APIs that enable you to send, receive, and track emails, built with developers in mind. Learn more today!
### Recommended Email Providers for Discourse
We strongly recommend using a dedicated email service. Email server setup and maintenance is _very_ difficult even for experienced system administrators, and getting any part of the complex required email setup wrong means your email won't be delivered, or worse, delivered erratically.
The following are template configurations for email service providers known to work with Discourse.
_The pricing information is included as a courtesy, and may be out of date. Discourse does not control the pricing for external services, be sure to check with the email provider for up to date pricing information._
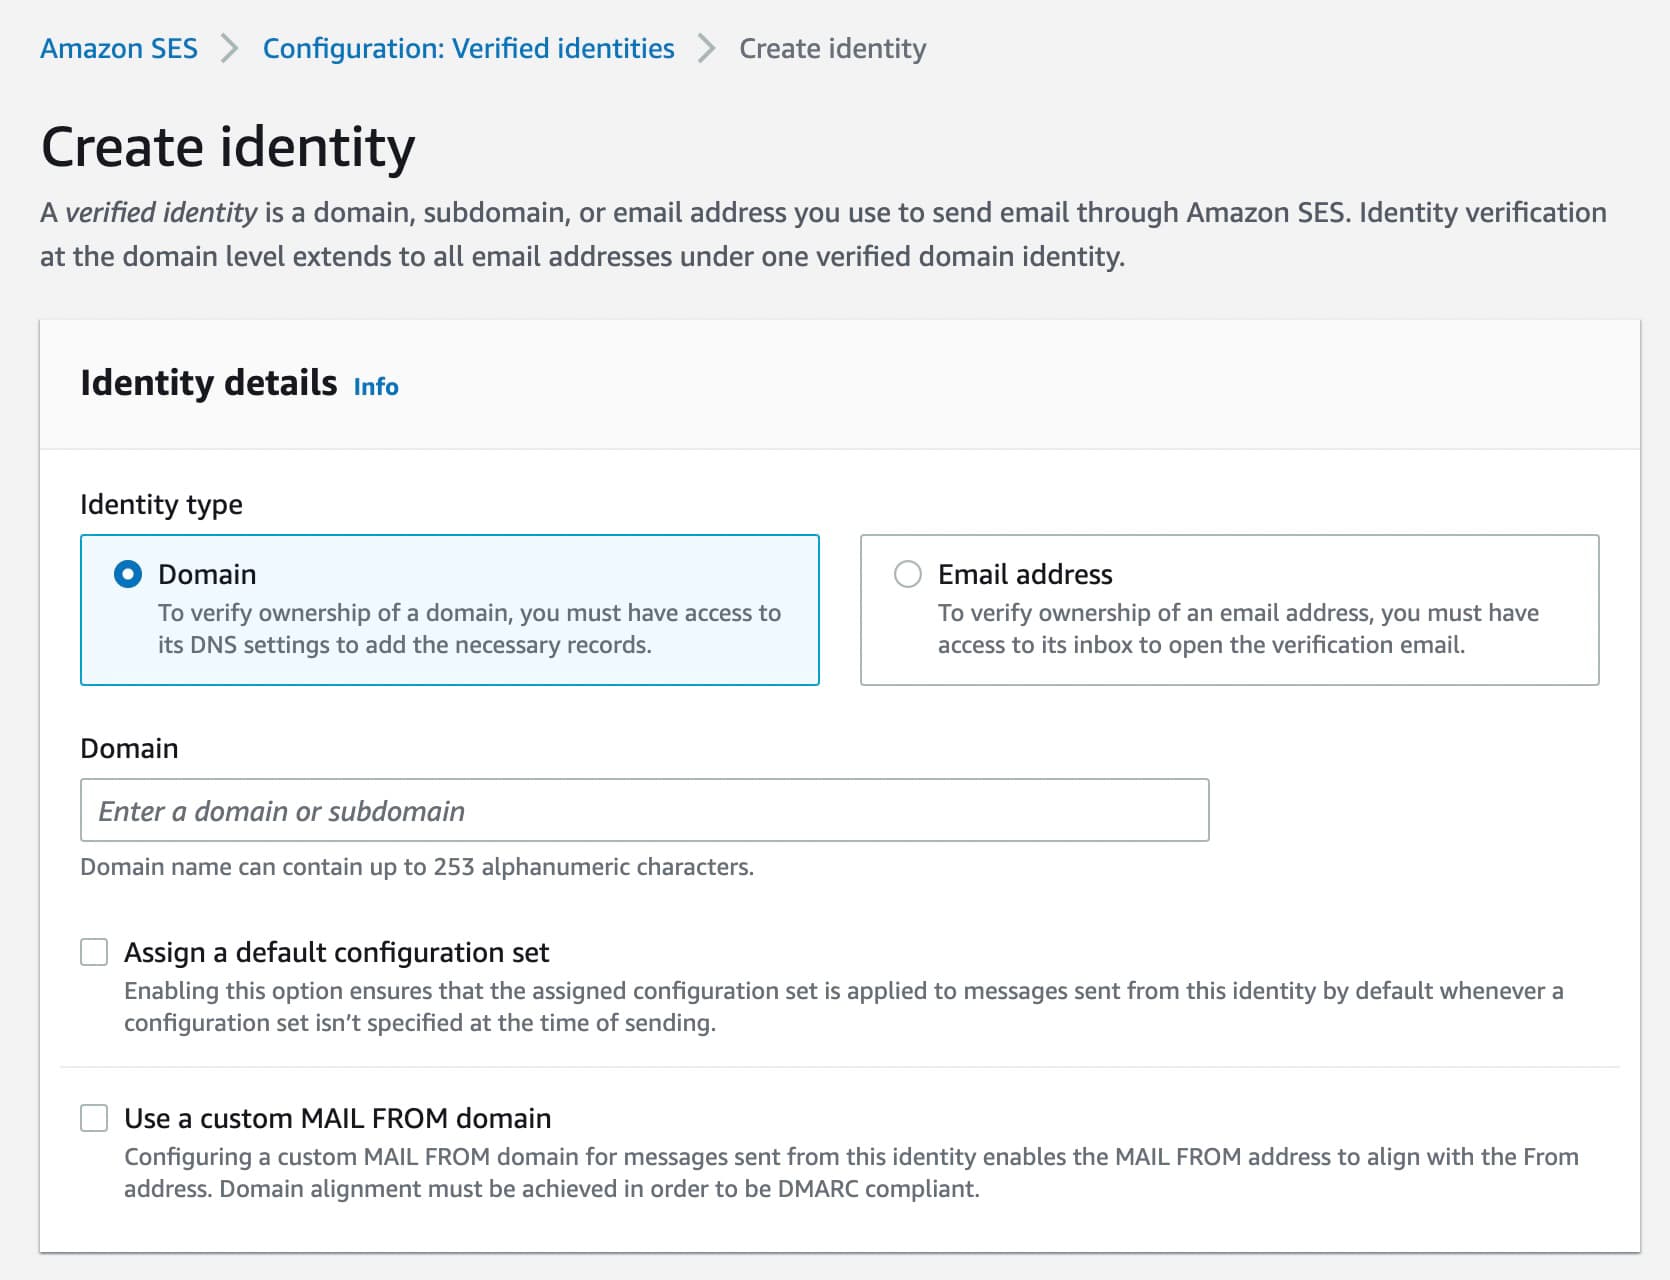
**Please note that in any email provider, you _must_ verify and use the subdomain, e.g. `discourse.example.com`. If you verify the domain only, e.g. `example.com`, mail will not be configured correctly.**
Enter these values when prompted by `./discourse-setup` per the [install guide](https://github.com/discourse/discourse/blob/main/docs/INSTALL-cloud.md#edit-discourse-configuration). To change the current email service, run `./discourse-setup` as well (this will bring the forum offline for a few minutes while it gets rebuilt).
#### [Brevo, previously SendInBlue, GDPR][sb] — 300 email per day free
SMTP server address? smtp-relay.brevo.com
SMTP user name? [SMTP credentials for your domain under [SMTP-Key tab](https://app.brevo.com/settings/keys/smtp)]
SMTP password? [SMTP credentials for your domain under [SMTP-Key tab](https://app.brevo.com/settings/keys/smtp)]
Port: 587
#### [Mailgun][gun] — 50k emails/month on a 30 day trial OR 10k emails/month with no trial
显示原始文件
这里使用的是mailgun,注册选择合适自己的plan就可以,大约占全部费用的5%
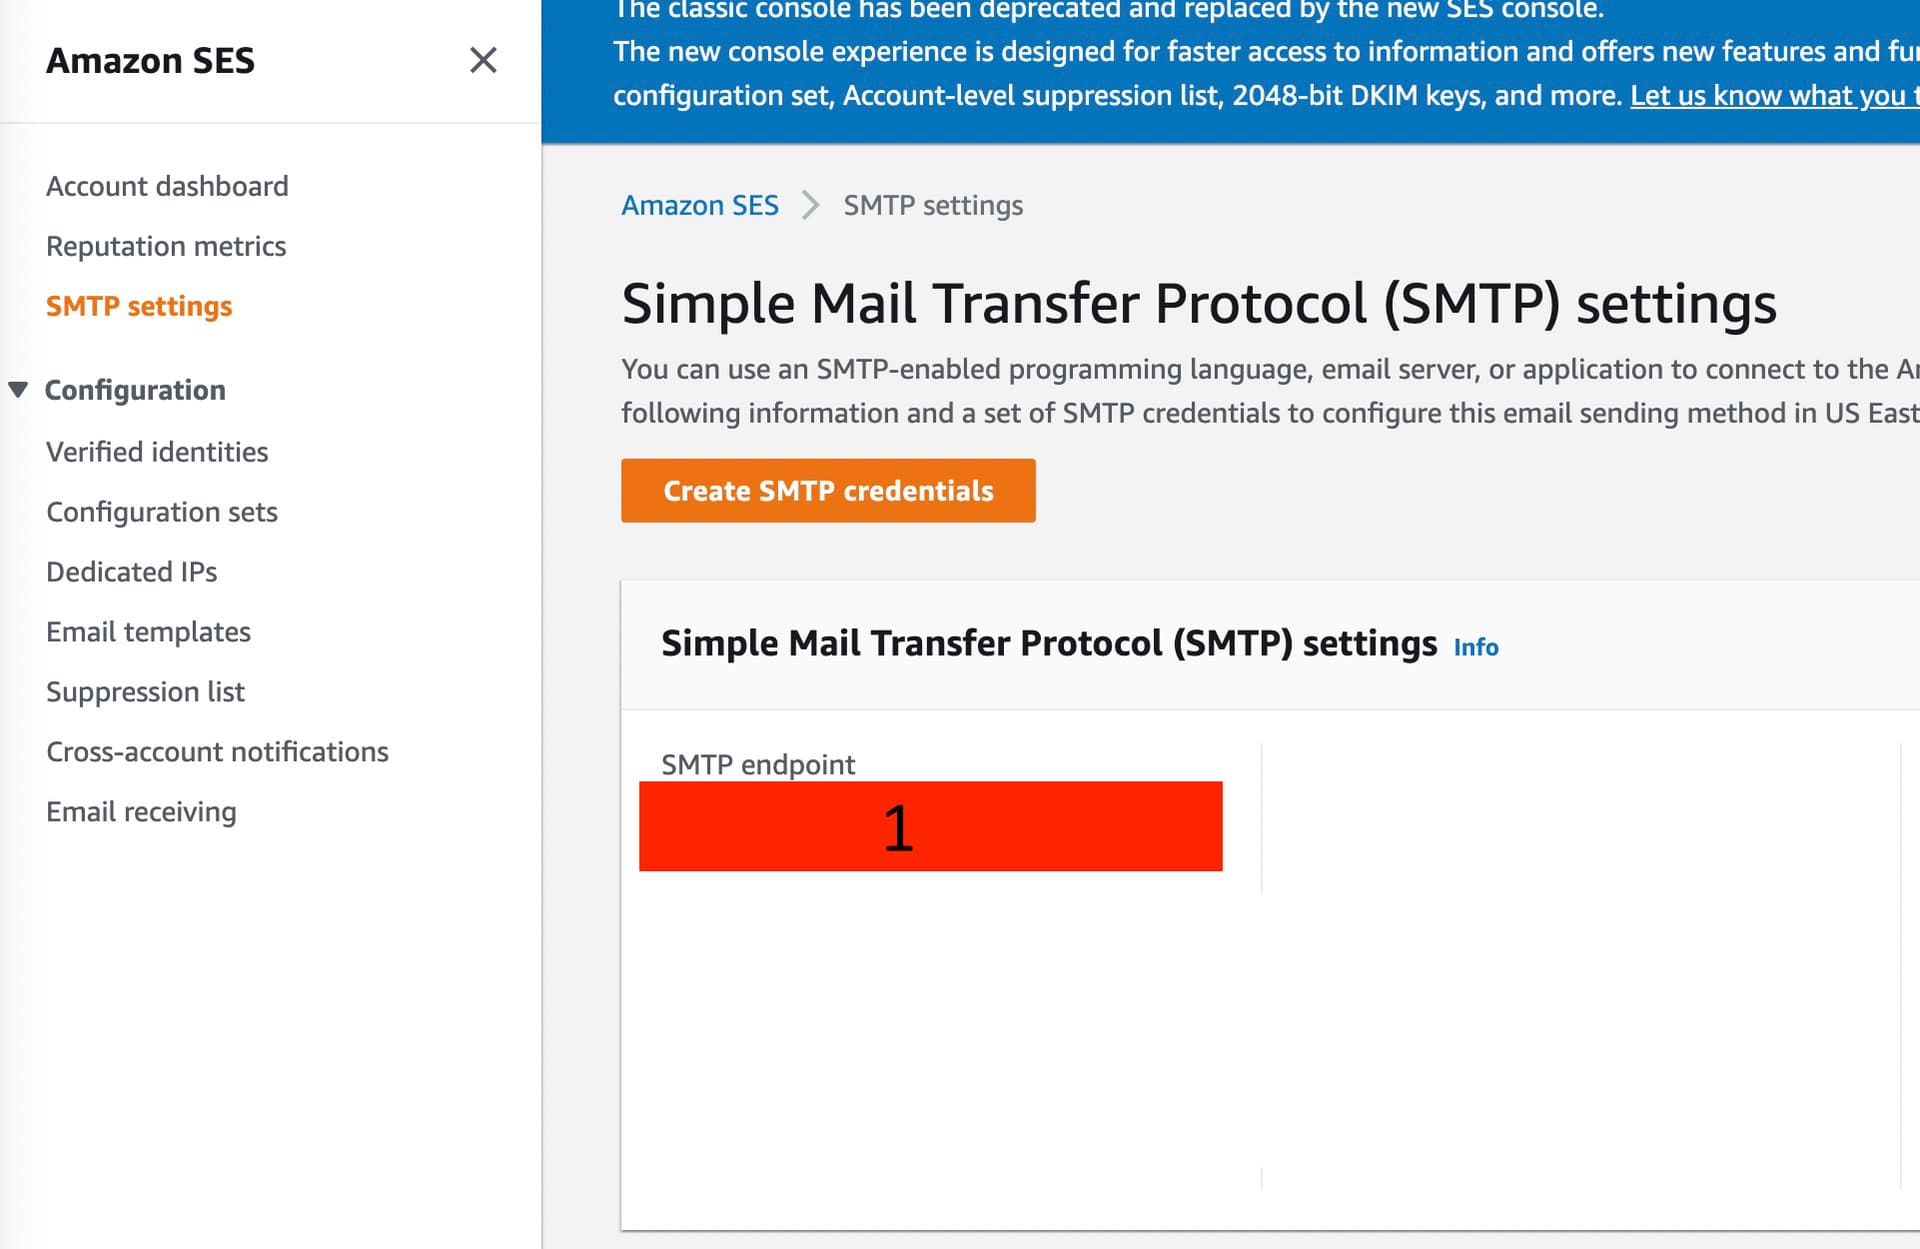
购买后需要记下的参数(可以在mailgun的控制面板里随时查看)
SMTP server address? smtp.mailgun.org
SMTP user name?      [SMTP credentials for your domain under domains tab]
SMTP password?       [SMTP credentials for your domain under domains tab]
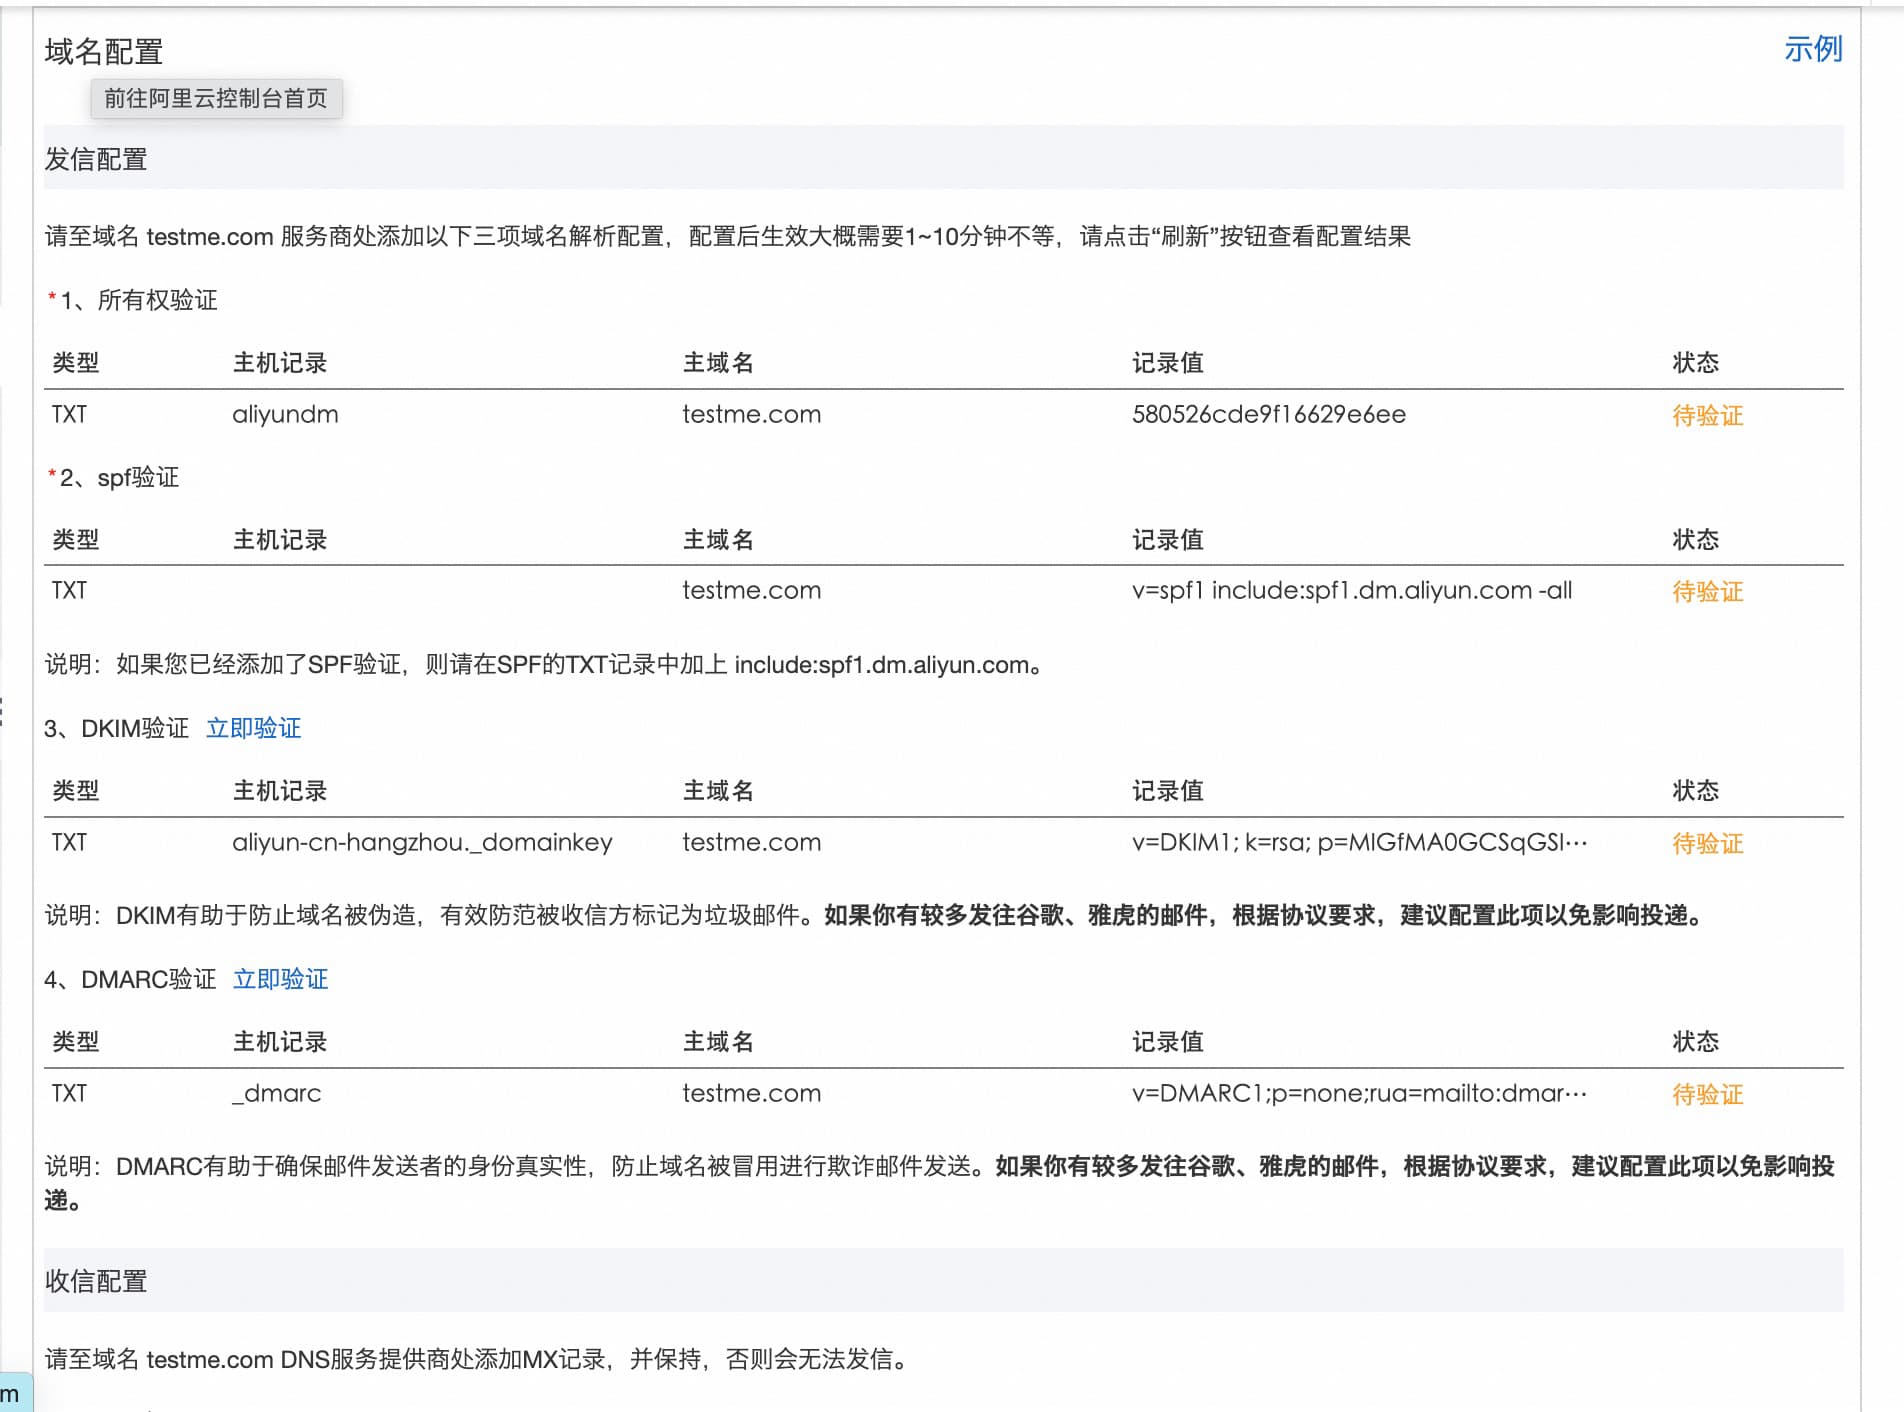
6 配置DNS
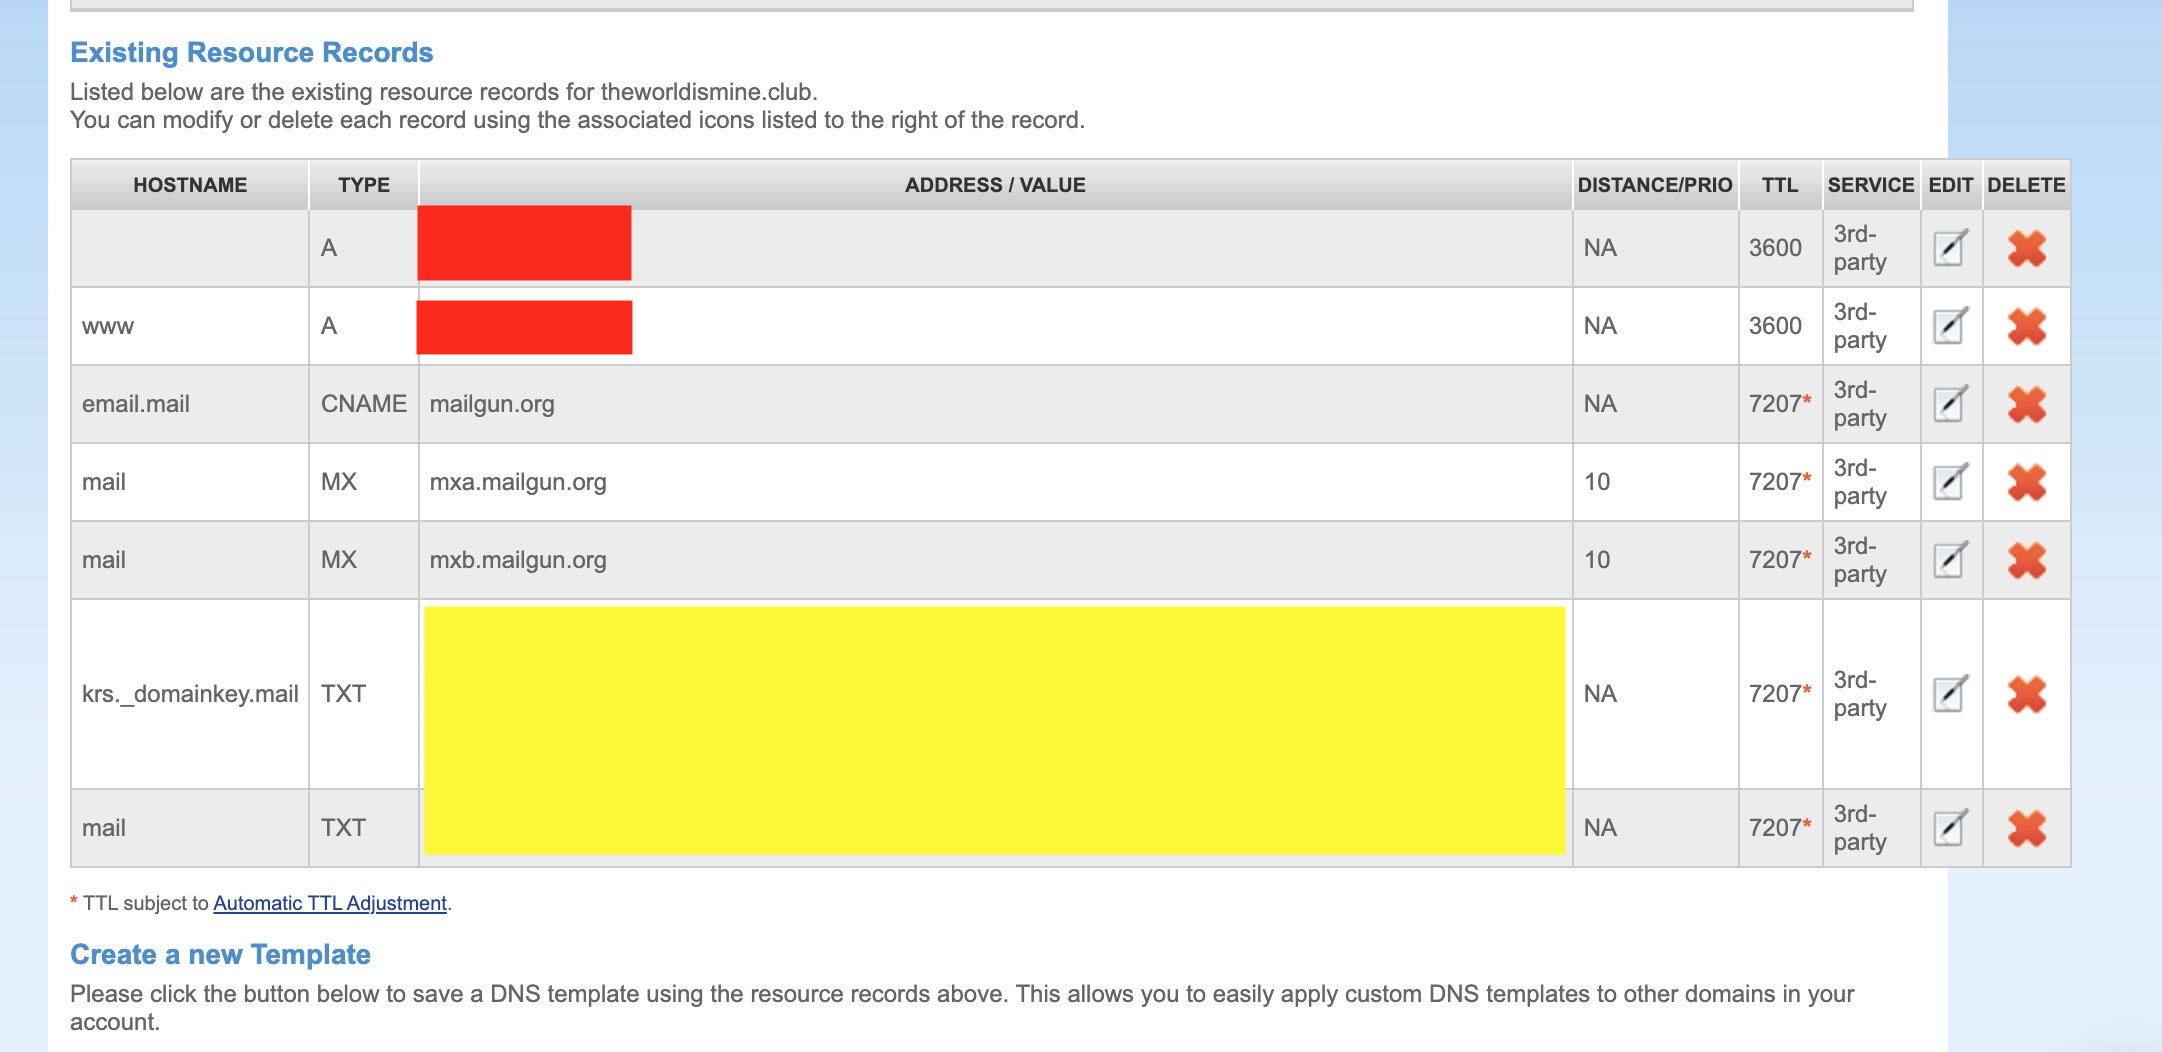
以namesilo为例,找到域名管理(domain manager)里面的更新DNS(update dns)
基本都长得差不多,表格一样的界面
然后如图加上类型为CNAME的邮件服务器域名
保存
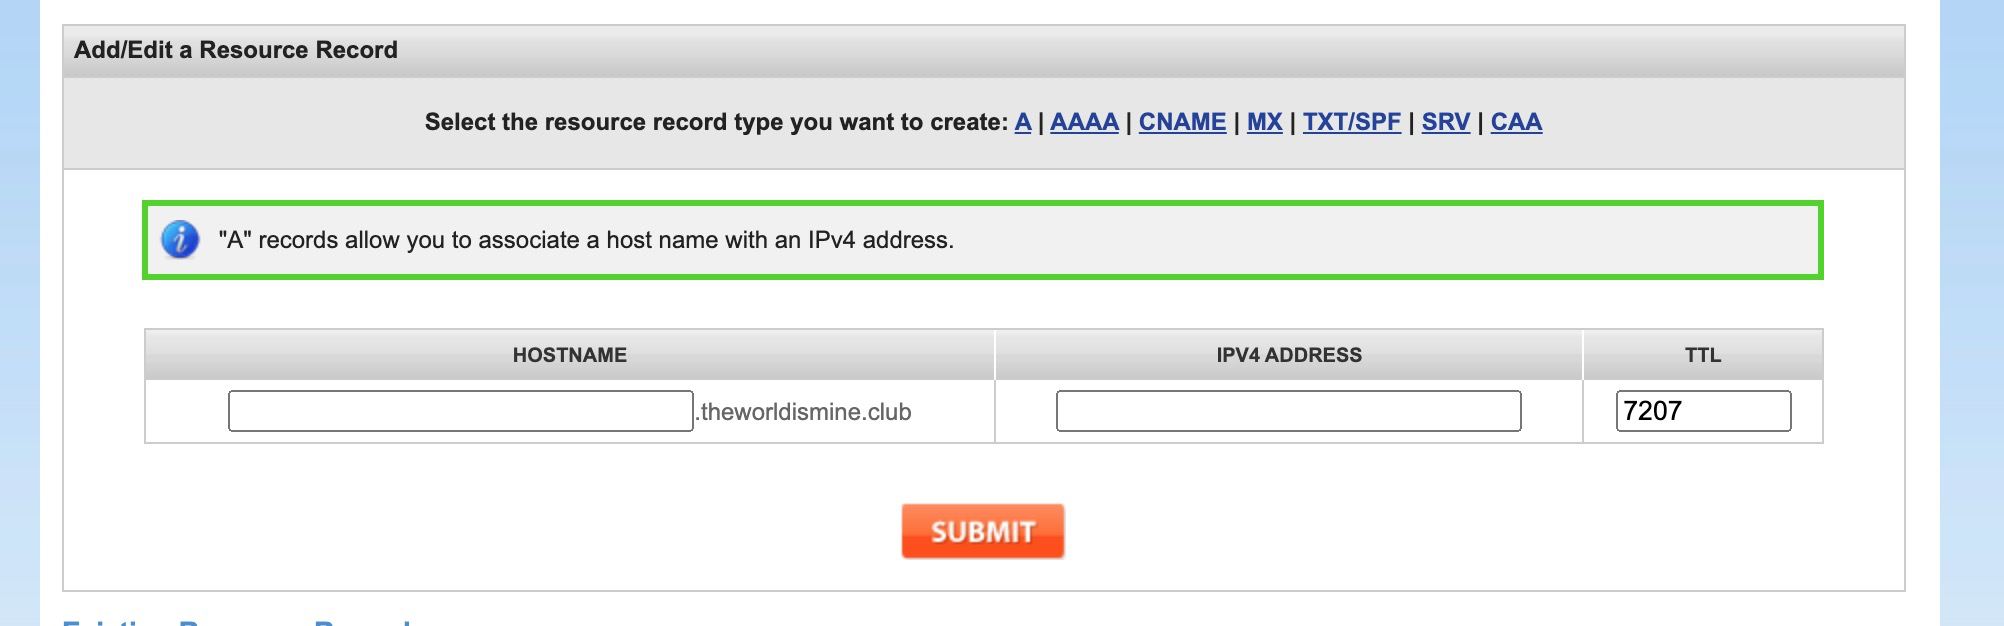
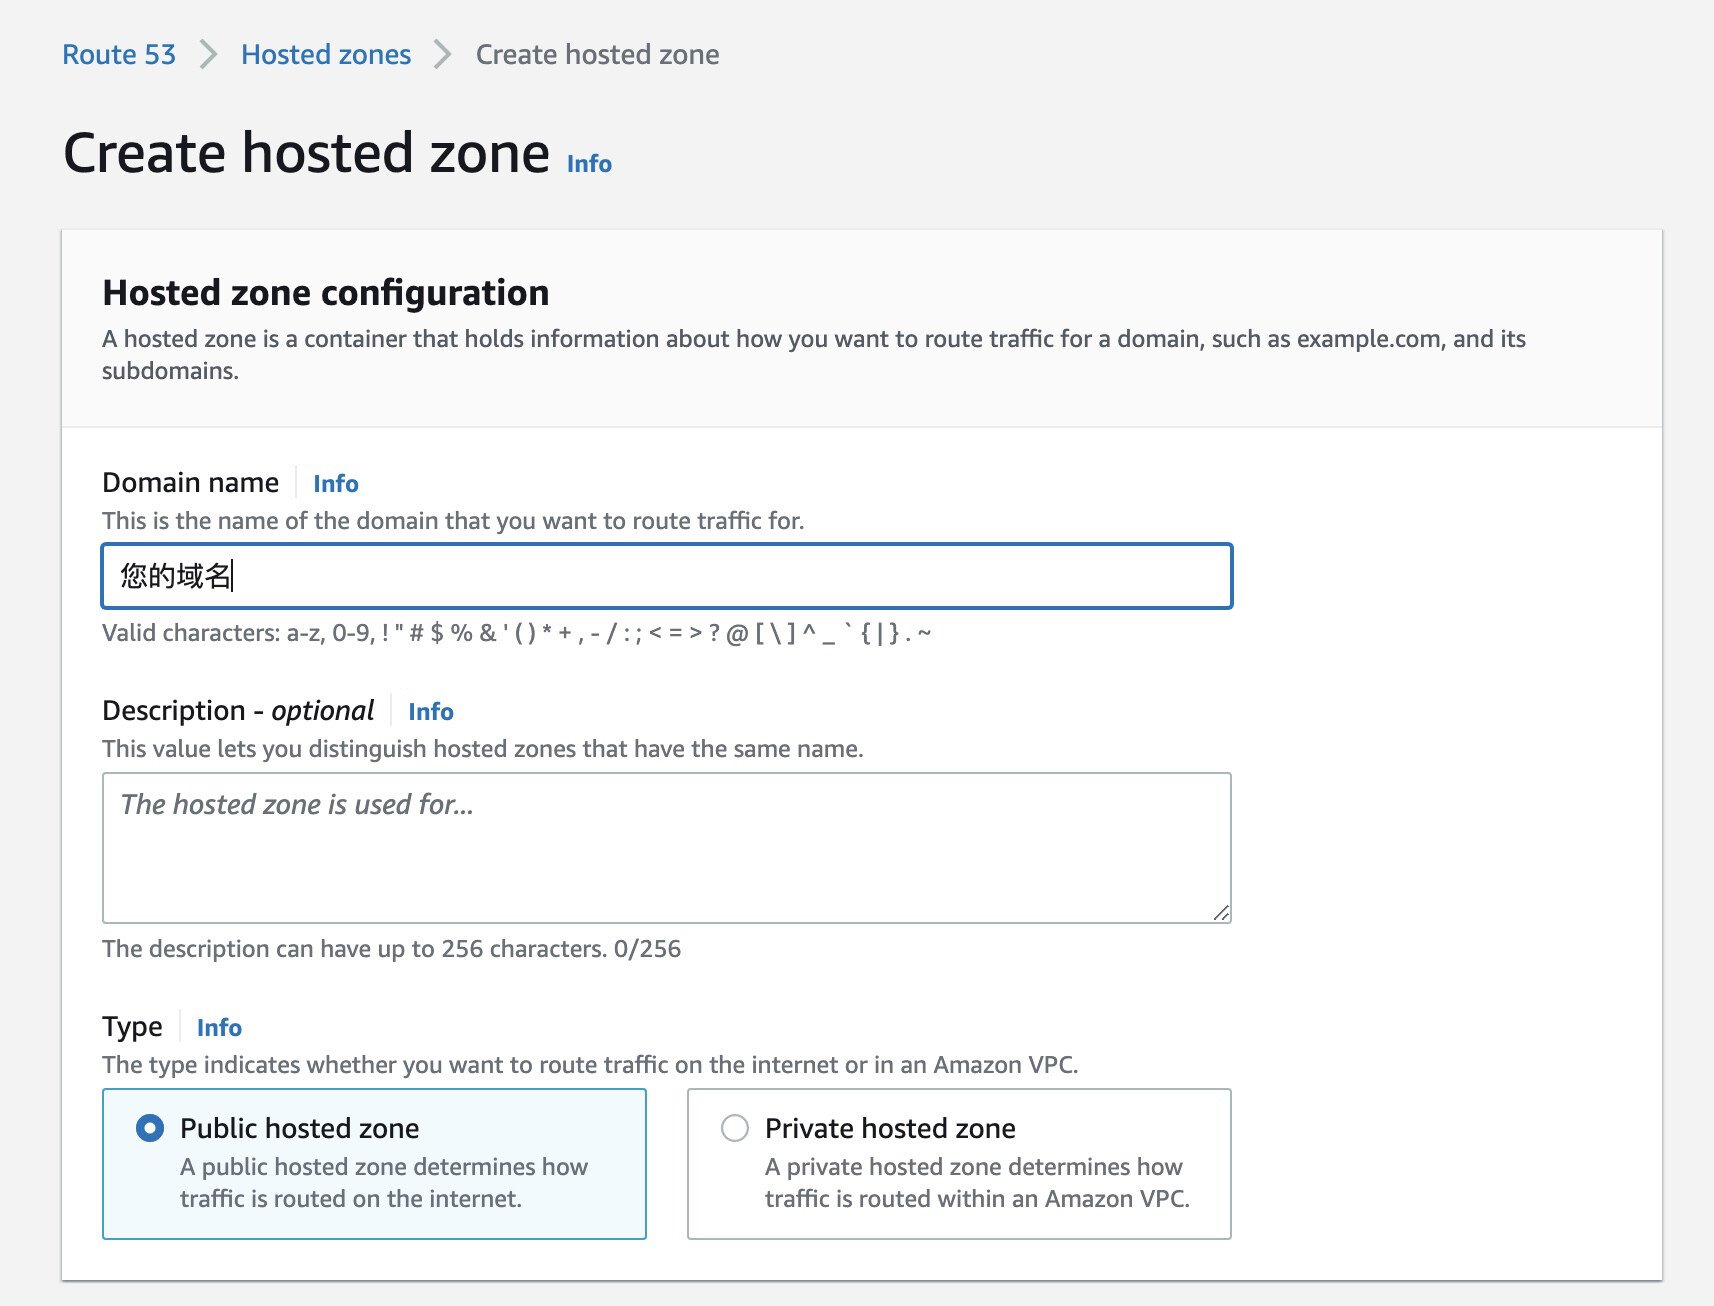
7 解析域名到主服务器
回到第2步中使用过的控制台,选择add domain name把之前购买的域名填上,类型选ARecord。
8 配置域名及邮件服务
根据官方教程步骤#7
# Install Discourse on a Cloud Server

> To install and self-host Discourse, follow the steps below. But if you'd rather skip the setup, maintenance, and server management, our official Discourse hosting takes care of everything for you.
>
> 👉 [Learn more about Discourse hosting](https://discourse.org/pricing)

> If you prefer to self-host but need help setting it up we have partners who can help.
> [Click here to explore self-hosting set-up options](https://discourse.org/partners).

**Set up Discourse in the cloud in under 30 minutes** with zero knowledge of Rails or Linux shell. One example
is [DigitalOcean][do], but these steps will work on any **Docker-compatible** cloud provider or local server. This
walkthrough will go through these in detail:

**[Before you start](#before-you-start)**

1. [Preparing your domain name](#1-preparing-your-domain-name)
2. [Setting up email](#2-setting-up-email)

**[Installation](#installation)**
显示原始文件
按照指令输入对应内容
下面以本站域名 theworldismine.club ,本站邮件服务器域名smtp.mailgun.org为例
Hostname for your Discourse? [discourse.example.com]:  theworldismine.club // 域名,无https://这部分前缀
Email address for admin account(s)? [me@example.com,you@example.com]:  个人邮箱 //管理员账户
SMTP server address? [smtp.example.com]: smtp.mailgun.org //邮件服务器域名
SMTP port? [587]: 587   //默认587
SMTP user name? [user@example.com]:   //来自第4步
SMTP password? [pa$$word]:  //来自第4步
Let's Encrypt account email? (ENTER to skip) [me@example.com]: //可跳过
Optional Maxmind License key () [xxxxxxxxxxxxxxxx]:
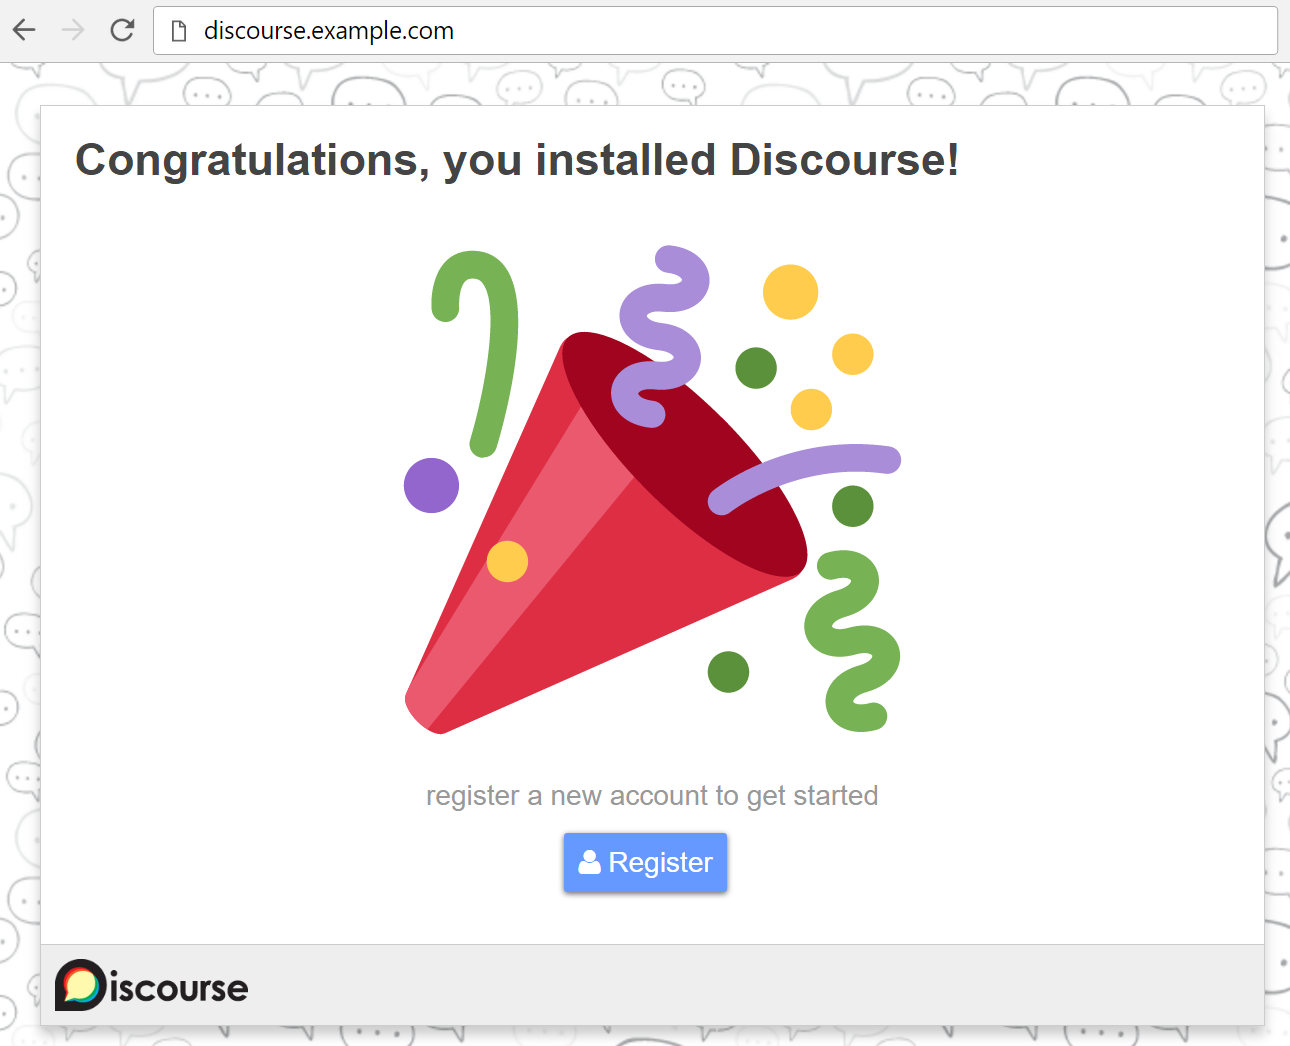
配置完以后,可尝试访问自己的域名,如果之前的配置正确且DNS解析完毕(有可能需要24h)会看到安装完毕的欢迎界面
点选register/注册管理员账户(后面可以改全局语言)后开始初始配置,配置完毕以后论坛就算是可以运行了,接下来可以根据自己的需要在管理员面板里进行自定义设置。